This tutorial describes the process of manually configuring Wi-Fi profile for eduroam on Windows 7.
It is available below.
Step-by-step guide to eduroam configuration on Windows 7
| 1. Download and install your IHEP eduroam root certificate from the IHEP eduroam CA website (link is external): | |
|
NOTE: Password to the certificate will be presented on the website. Remember to write it down - it will be needed to install the certificate |
 |
|
|
 |
| Click Next button to proceed | 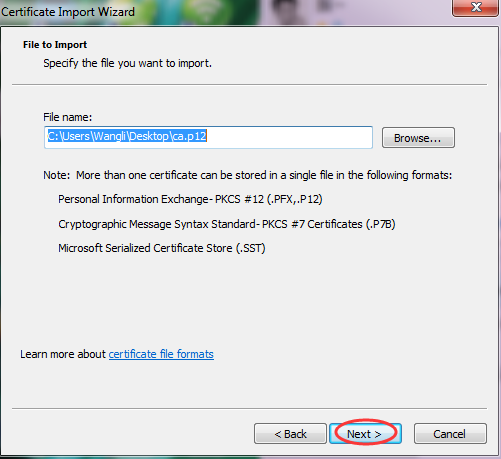 |
| Fill in the password blank with "Certificate password" that is presented on the website. Click Next button to proceed |  |
| Choose "Place all certificates in the following store". Click Browse button to proceed |  |
| Select the certificate store you want to use:Trusted Root Certification Authorities .Click OK button to proceed |  |
| Click finish button |  |
|
2. Download and install your personal eduroam certificate from the IHEP eduroam CA website (link is external): |
|
|
NOTE: Password to the certificate will be presented on the website. Remember to write it down - it will be needed to install the certificate |
 |
|
|
 |
| Click Next button to proceed | 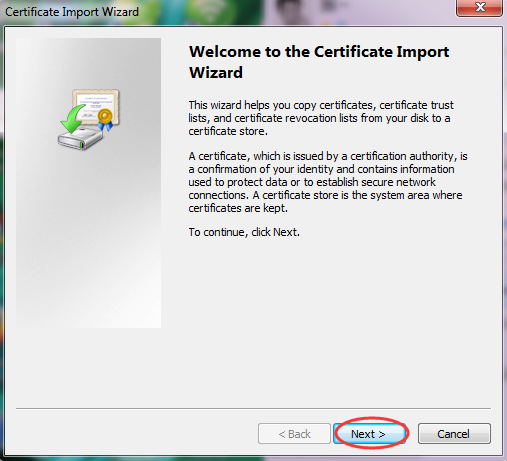 |
| Click Next button to proceed | 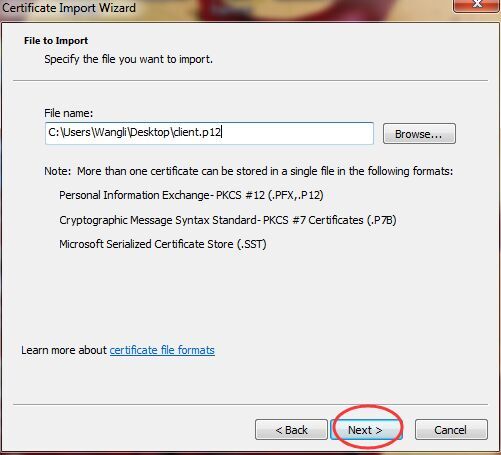 |
| Fill in the password blank with "Certificate password" that is presented on the website. Click Next button to proceed |  |
| Click Next button to proceed |  |
| Click finish button |  |
|
3. Configure to eduroam Wi-Fi network |
|
|
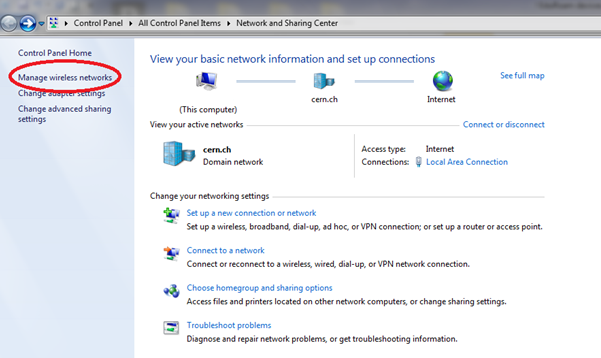
Click on “Open Network and Sharing Center” in the network connection menu. |
 |
|
In “Network menu and Sharing Center”, choose "Manage wireless networks option" |
 |
|
In “Manage Wireless Networks” window:
|
 |
|
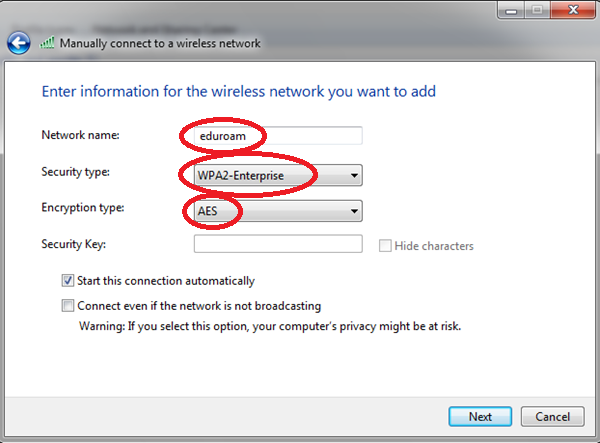
In “Manually create a network profile” window, the following information has to be filled in to create the connection:
|
 |
|
Once this is done, advanced configuration options have to be tuned. To do that, right click on the newly-made profile and select “Properties”. |
 |
|
In “eduroam Wireless Network Properties”, select the “Security” tab and fill the profile with the following information:
|
 |
|
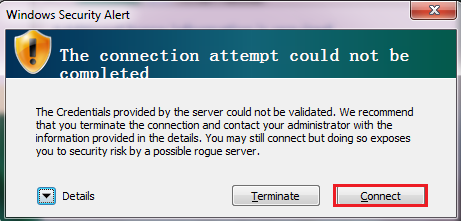
Please try to connect to the wireless eduroam network. At the first connection only, a pop-up window "Select Certificate" will ask you to:
|
|